What direction is best for using a trowel when flooring?
For any flooring job, whether you’re laying carpet, vinyl or tiles, spreading floor adhesive (glue) is a crucial step. An inconsistent spread can lead to uneven and even loose flooring, so it’s best to get it right. However, what is the right way to spread adhesive? The methods that flooring experts swear mean they get an even spread every time.
What is an Adhesive Spreader or Trowel?
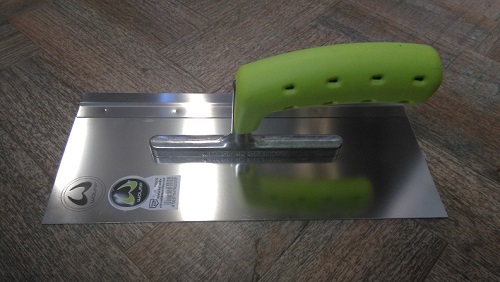
Depending on the type of flooring you’re working with, you may need a different adhesive, but the spreader or trowel you use is broadly the same. Adhesive trowels or spreaders are flat pieces of metal with a handle, used for spreading adhesive and creating an even distribution across the subfloor. Most spreaders have a replaceable rectangular blade and you can use all four edges to spread the adhesive. The most effective and versatile trowel has two straight edges and two notched edges, which allow the correct amount of adhesive spread for maximum coverage.
Some smaller spreaders use a trapezium shape with only one spreading edge and a narrow handle at the top. These are useful for small areas such as repairs or awkward corners.
Before you start: Prepare the SubFloor
Before you can spread adhesive it’s important to prepare the subfloor well. Any cracks or holes will fill with adhesive compound, making it more difficult to spread, so ensure you have filled all the cracks and smoothed them well. You will also need to vacuum any particles such as dust, lint, or residue, as these will mix with your adhesive and make it less effective.
Use a spirit level to check that the subfloor is flat. If there is a significant tilt, your tiles or flooring may slide before drying, so you may need to use a self-levelling compound first.
Using an Adhesive Spreader: How to Trowel
Getting to grips with a floor tile adhesive spreader takes some time and practice. Take it slow and steady until you are confident with how the consistency of your adhesive or mortar responds to the pressure. Once you have mastered this skill you will be able to judge what direction to trowel in by the shape of the floor you are working on. Practice these steps to complete flooring jobs more effectively and in less time.
These instructions are primarily focussed on tiling, with tips for how to adapt the method to carpet or vinyl floors.
You Will Need:
- The correct adhesive for the floor type, mixed well
- Safety gloves
- Safety glasses
- Old clothes/overalls
- Measuring tape
- Framing square
- Pencil
- Notched adhesive spreader / adhesive trowel
- Palette knife or margin trowel
Mix your adhesive
Using a drill whisk or margin trowel, mix your adhesive according to the instructions. Ensure there are no lumps and check the consistency by loading some material onto the trowel and seeing if it falls or runs. When the adhesive stays on the trowel but remains soft enough to spread, the consistency is right and you’re ready to go.
Load the Trowel
Using your palette knife, load the notched trowel with a small amount of adhesive to start with. Around two scoops with your palette knife will be enough, but too much will be difficult to spread. If your skin is sensitive, avoid getting the adhesive on your hands as it can be an irritant.
If you are using a fine liquid adhesive that flows such as for carpet or vinyl, you can pour a small amount onto the floor before spreading, and you can go straight in with the grooved edge of your vinyl floor adhesive trowel.
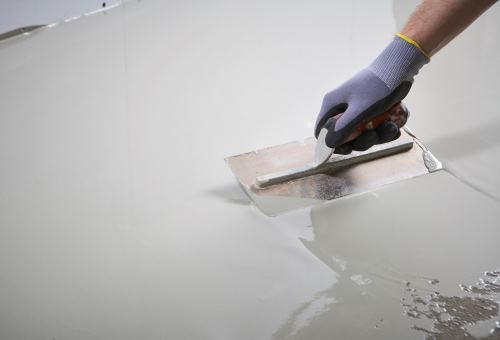
Start Spreading
Start at one corner of the area. Use the straight edge of the trowel to apply the adhesive to the surface that your first tile or section of flooring will cover. Hold the trowel at an angle, with the notched edge raised, and move it backwards and forwards, side to side until the adhesive is even. Spread enough to lay the first section, working quickly to avoid the adhesive drying out.
Get Grooving
Now turn the trowel around so you can use the notched edge. Hold the trowel at an angle so that the notches leave a thick ridge in the adhesive. Pull the notched edge through the adhesive in a straight line from one side of the area to the other, using one smooth motion. This will give you even coverage on the back of the flooring.
Apply Flooring
If you are using tiles, place the tile straight down onto the adhesive and move it back and forth gently, perpendicular to the trowel ridges. So if your ridges go left to right, move the tile forward and back. This collapses the ridges into the valleys and gets rid of any air pockets in the adhesive, supporting the whole tile and ensuring a strong bond between the tile and substrate.
For Vinyl, spread the adhesive across an area the size of one sheet. Roll the sheet out from one wall to the other. Using a wide broom, push any air bubbles out to the edges, starting at one wall and pushing firmly to bond the vinyl to the substrate.
For glue-down carpet, ensure it has been measured and cut already, and rerolled with the backing out. Place the edge of the carpet against the width wall before spreading the adhesive in a wide strip in front of the carpet. Roll the carpet slowly onto the adhesive, flattening it with a board or roller to keep it smooth. Repeat these steps until you have carpeted the whole room, then return to the beginning edge and glue it down.
Finishing
To finish the edges or awkward corners, you might benefit from a smaller, triangular trowel or spreader for the adhesive. Trim or cut your flooring to the right shape for doorways and edges. Use the small adhesive spreader in the same way as before, creating ridges and valleys in a straight line and pressing the flooring down to remove any gaps.
What Direction to Trowel In?
Using a floor adhesive trowel correctly is a core skill for any flooring professional. Advice to trowel from side to side in straight lines is given by the CTEF (Ceramic Tile Education Foundation). Ultimately, as long as your ridges and valleys are in straight lines, you should get a good bond between the flooring and substrate. The key to good adhesive troweling is making sure you have an even spread, so take it steady, angle the trowel and apply the same amount of pressure across every area.
Adhesive Trowels at Re-New Flooring Tools
You can browse adhesive trowels and spreaders in our online shop, along with other flooring tools. Choose a style that suits your purpose, and ensure you have plenty of spare trowel blades. Care for your trowels by keeping them clean and dry, as any leftover bits of mortar will affect how evenly the blade spreads in future.