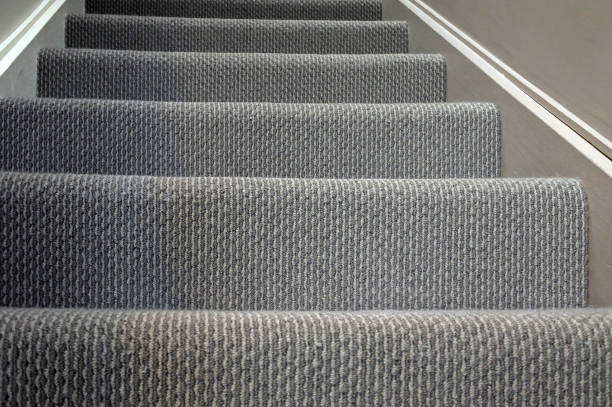
How to Fit Carpet on Stair Winders, Edge to Edge
What is a winder stair?
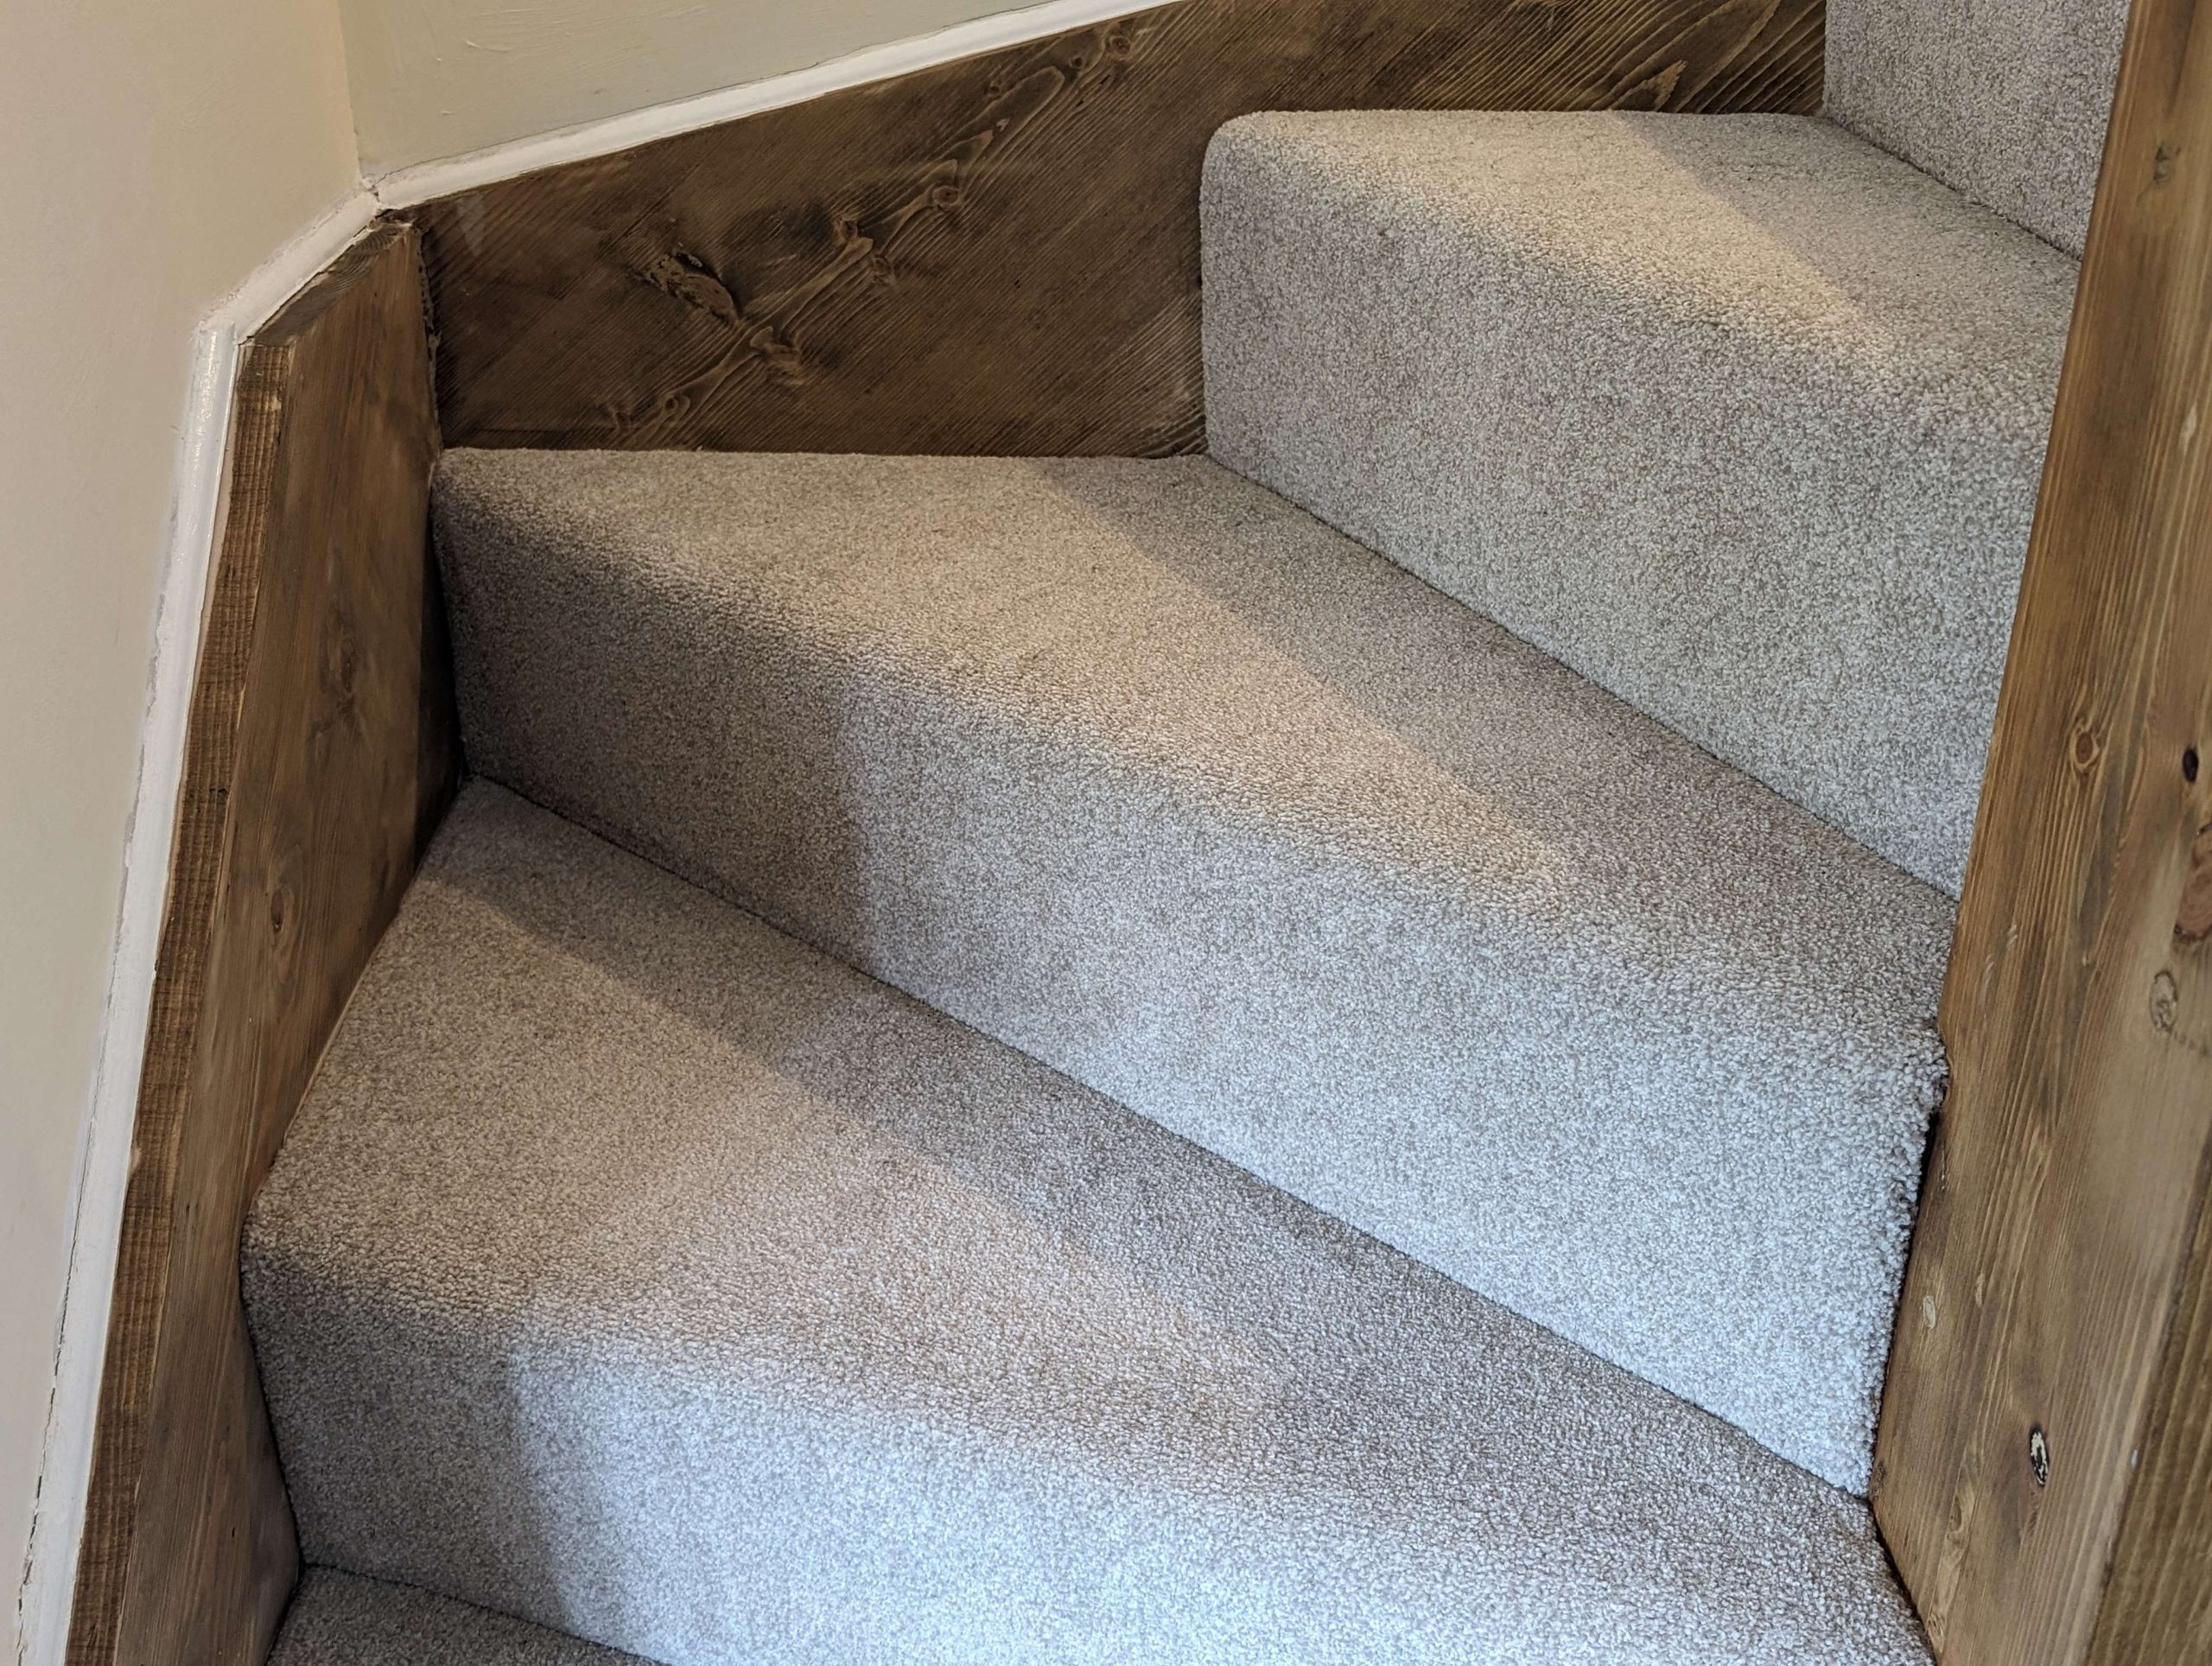
When a staircase has to go around a corner, the stairs around the angle have either a triangular or kite-shaped surface. These are called winding stairs or winders. If the stairs you’re working on have winders, you won’t be able to fit the carpet in one piece. Work up to the winder stairs and beyond before beginning the winders.
How to Install Carpet on Stair Winders (Corners)
In these instructions, we are working from the top down, which is easiest for DIY winder carpeting. Many professionals will work upwards, fitting against the riser first and using a knee-kicker to stretch the carpet across the stair tread. Both methods can achieve a quality finish.
1. Measuring winder stairs
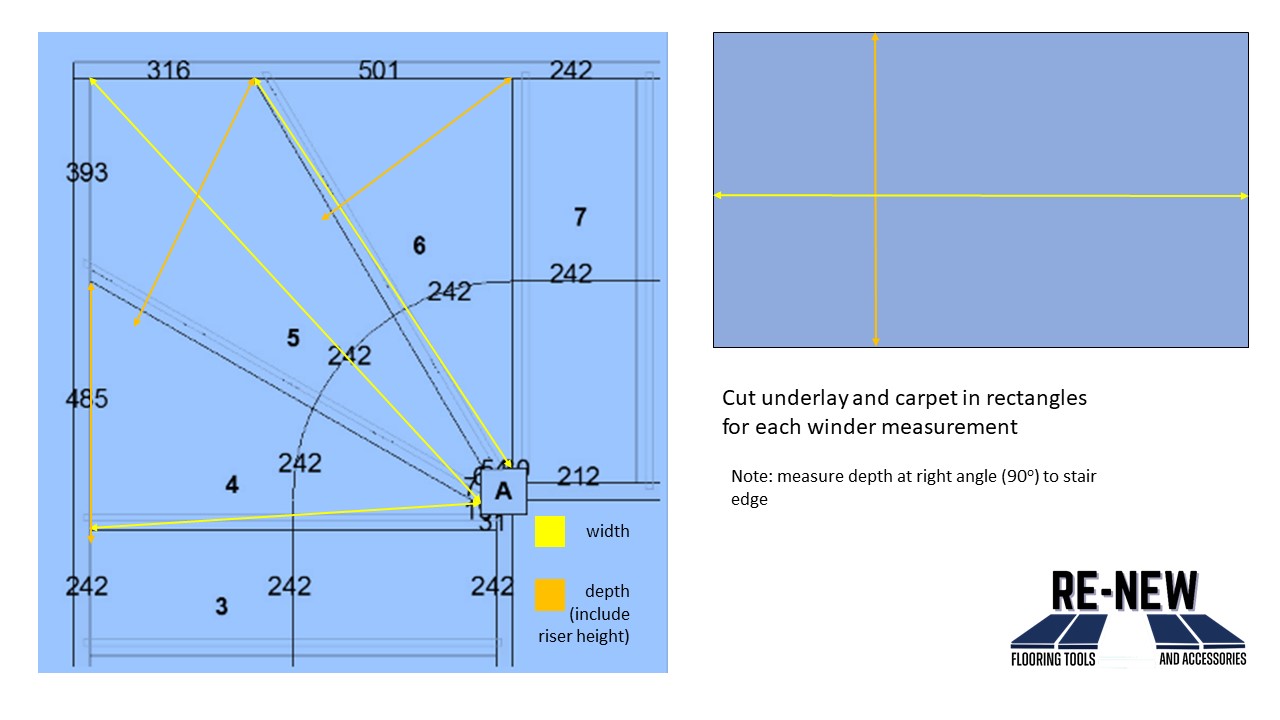
How to measure winders? They are not rectangular, so this is a common question.
The key is to measure at the widest point. This will feel wrong because it won’t be square to the edge of the step or to the wall. However, it’s tried and true and will provide a big enough piece of carpet and avoid gaps.
Triangular winder
Width: from the front of the wide edge to the back of the narrow edge.
Depth: at right angles to the front of the stair, and measure from the corner, square down the riser.
Kite winder
Width: from one side of the narrow edge to the corner of the stair.
Depth: at the widest point, at right angles to the edge of the stair and down the riser.
When cutting winder underlay and carpet, cut rectangular pieces to these measurements.
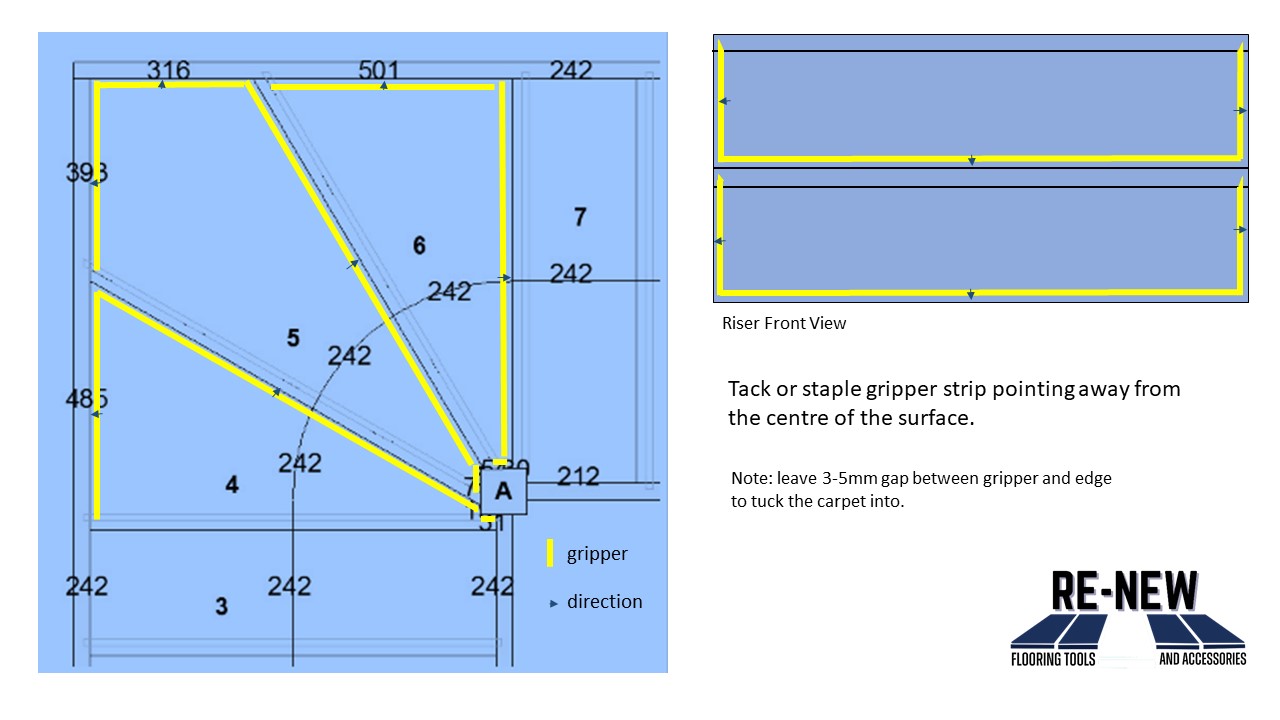
2. Install Grippers
- Fit your gripper strip to the back edge of the stair tread, with arrows facing the riser. Use staples or a tack hammer.
- Next fit shorter grippers on the sides of the tread, with arrows pointing outwards. On one side of the winder, the gripper may be very short (25mm). These should not go onto the nose or edge of the stair tread.
- Then fit grippers across the base of the riser. The arrows should face down towards the stair below. This means the grips at the deepest part of the stair point towards each other.
- Make sure you leave a gap of 3-5mm between the gripper and the edge you’re fitting against so that there is room to tuck the carpet into.
- For extra security, you can pin a short piece of gripper strip to each vertical side of the riser. If you’re doing this, cut a 45o angle off the top so it doesn’t stick up too far. Tack them at the bottom and top, leaving a 5mm gap for tucking at the sides.
Cut and Fit Underlay
- Cut the underlay for winders to the measurements taken in stage 1.
- Lay the long edge of the underlay along the bottom of the riser. Pull it up onto the step and make a small relief cut where the next riser meets the wall. This lets you press the underlay into the corner without a bulge.
- Fix the underlay to the stair with staples or carpet spray.
- Make small cuts by the nose of the stair to leave a notch of underlay between the grippers.
- The underlay should run all along the front edge of the stair, wall to wall
- Trim the edges so the underlay fits between the grippers. You should now be able to lay the carpet onto a flat surface across the grippers and underlay.
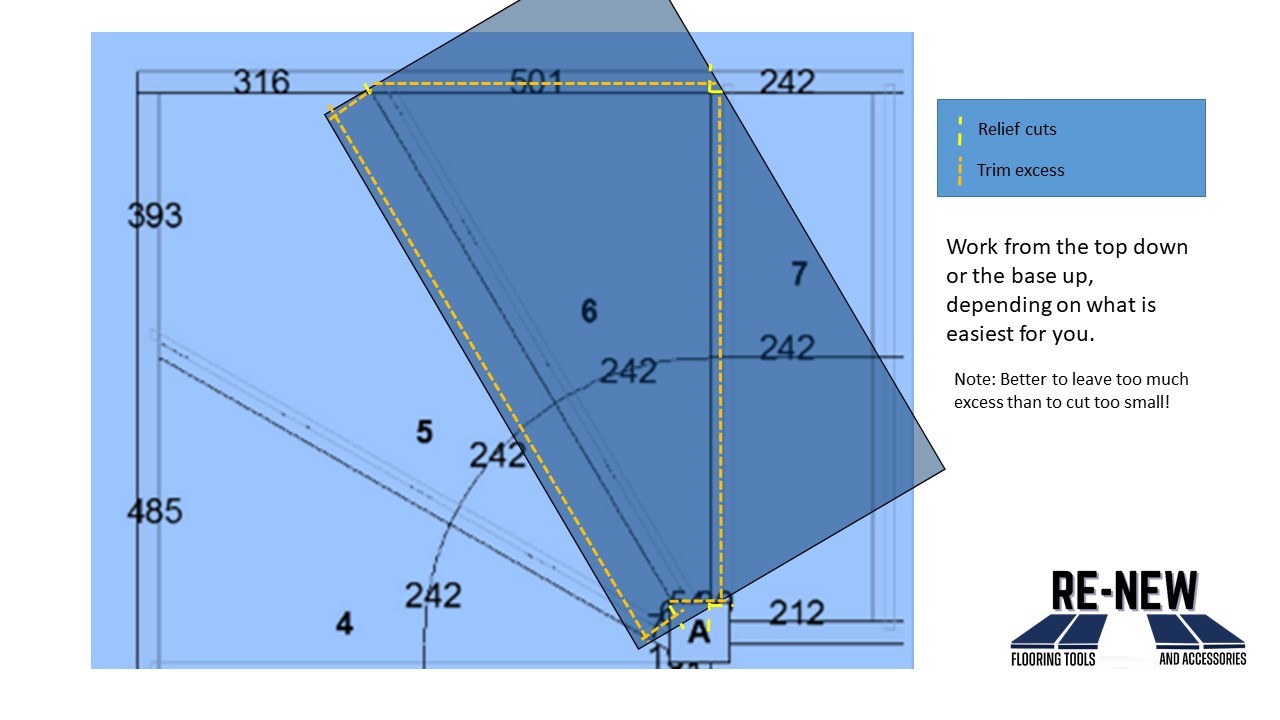
3. Align Carpet
Just the same as the underlay, you’ll have a rectangle of carpet the same width as the steps.
- Line up the long edge with the bottom of the step, with the pile in the right direction. You can use your knee against the stair nose to hold the carpet in place while you work.
- At the wide side of the winder, make a small relief cut down to just above the front edge of the step to take the tension off. This lets the carpet fold down while the wall is in the way.
- Trim the wall edge of the carpet, leaving 10-20mm excess.
- Fold over excess that overlaps the next riser and trim to about 20mm from the back of the tread. You don’t have to get it perfect yet, so don’t go closer than 20mm.
- Make another small, straight relief cut at the front of the stair, where the narrow edge meets the wall or bannister post. This lets the rest of the piece curve around more easily.
Note: Don’t press hard while trimming, or you’ll cut the carpet underneath!
4. Relief Cuts for Stair Corners
- Push the carpet into the back corner of the tread and fold over the excess.
- Put the knife in the corner, and press so that it cuts through the underside where you want the corner to be.
- Lift the carpet a little, keeping the blade in, and cut out to one edge.
- Then cut from the corner to the other edge, making a V-shaped gap.
- Press the carpet into the corner, and the V should close easily, letting you push it all the way down.
- Repeat this on both sides of the tread.
Note: If you’re carpeting a kite riser, you’ll need to make 3 of these relief cuts.
5. Trim and Tuck around the Stair Tread
Now you can see how your carpet rectangle fits the winding stair more easily. You can start to trim closer and tuck the excess.
- Start at the back of the stair tread, and trim the excess to 10mm.
- Working from the centre out, use the stair tool to tuck the carpet down between the riser and the gripper. You can hit the handle with a mallet for extra tucking force.
- Repeat on the sides, trimming and tucking to get a professional finish.
Note: You can also use the flat side of the stair tool to press and bend the pins over towards the sides so that they hold the carpet firmly.
6. Trim and Tuck Around the Riser
The same again, but against the vertical riser surface now.
- Make a V-shaped relief cut in the corners where the riser meets the next tread. This should now fold down the side and fit in neatly.
- Stretch the carpet down and press along the width with the stair tool to tuck it into the gap behind the vertical gripper.
- Trim the sides, leaving 5-10mm of excess. Tuck the sides, rolling the excess so that it folds up in the gap behind the vertical gripper. This makes sure it is tight. Then tuck it in further, making sure not to scratch the skirting.
- Finally, trim along the base of the riser and remove excess.
That’s How to Carpet Curved Stairs Yourself
These instructions are designed to support DIY carpet fitting and professional carpet fitters alike. For the rest of the stairs, read our article: how to carpet stairs.
We stock professional-quality carpet fitting tools from known brands. For complete beginners, we even have a carpet fitting starter kit.